Sunday, September 28, 2008

Recipies: Double Crumble Rumble!

Today's post marks a Theatre Cooks first: the first 'original' recipe! By the end of this post, you will have the recipe for my mum's crumble topping. That is the taste of my childhood.
DSC01023.JPG

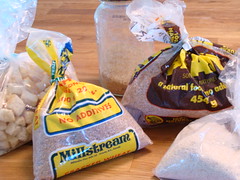
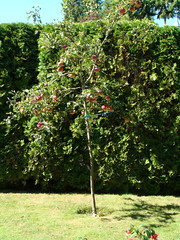
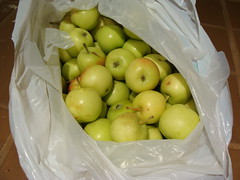
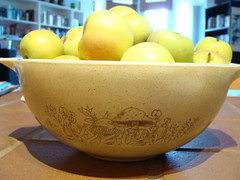
The event that lead up to the great Apple Glut of 2008 was our dear friend Lester coming over for some computer gaming with my boyfriend, and he brought with him about 5kg of teeny tiny green apples from his parents' apple trees. This being about a week before I was leaving for the land of more apples, I was pretty exited to get going on cooking these apples.

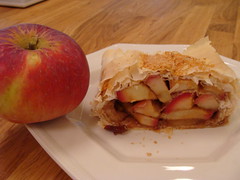
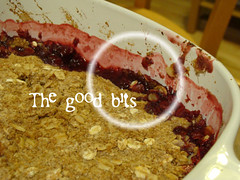
My first thought for apples isn't pie. It is crumble. My love of pastry is well-documented, but there is just something about crumble. Specifically the crunchy, sticky, fruity bits you get around the edges of the dish.
goodbits.jpg

I made a big, deep-dish crumble for us, and then made some apple crumble bars for easy eating at game night the next night. No pictures of the finished crumble bars, because that was at a friend's house.

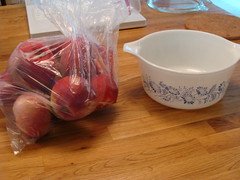
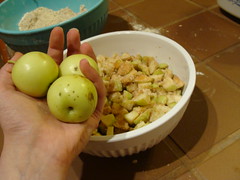
The apples, as mentioned, were super tiny. We estimated that one regular apple would be about 6 of these baby apples. So when the recipe says '5 apples' imagine me cutting up 30 ikkle apples.
DSC01030.JPG

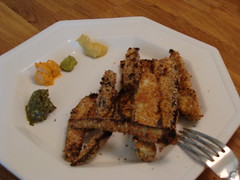
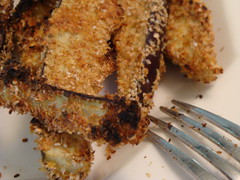
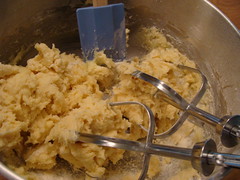
The crumble bars were very tasty. I made them for ease of eating, thinking I could just put a big plate of them on the table, and we could eat them like cookies. The topping didn't harden up as much as it seems to have done in the photos over at Pete Bakes. While still good, the topping was still quite dusty and flour-y. I'm wondering if I mixed too much, and broke the butter up too much, thus no tasty little lumps.

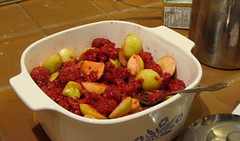
The best thing about mum's crumble recipe is how easy it is. When we suddenly remembered that we had a bag of homegrown raspberries in the freezer, those got defrosted and thrown in. It also saved Patrick from cutting up even more apples.

DSC01024.JPG
hand included for scale

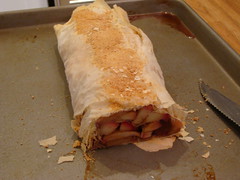
First, the Apple Crumble Bars
(original recipe found at Pete Bakes!)

4 cups flour
1/2 tsp salt
1 1/2 cups sugar
1/2 cup brown sugar
1 1/2 cups butter, softened
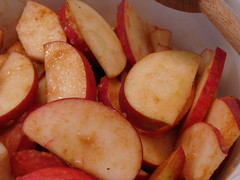
6 cups granny smith (or a variety of your choice) apples, skinned and diced (about 5 apples)
1 tsp cinnamon

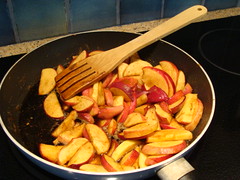
1. take the butter out of the fridge to soften (do NOT melt) on the counter as you peel and dice up the apples into small cubes. squirt with some lemon juice and set aside.

2. combine the flour, salt, white sugar and brown sugar in a bowl.

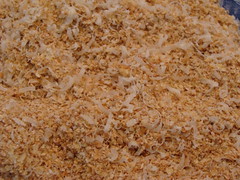
3. cut the butter into the dry ingredients. the butter should not be melted. what we’re going for here are crumbs. you can either do this with a wooden spoon, or you can do what i do, and use your hands to crush it all together. (I love using my hands for mixing!)


DSC01021.JPG

4. take 1 cup of the crumb mixture and mix it with the apples. add the cinnamon as well and set aside.

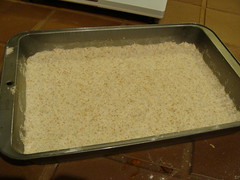
5. preheat the oven to 350 F and grease and flour a 9×13 baking pan. take 1/2 of your remaining crumb mixture and press it into the bottom of the pan. bake for 10 minutes.


DSC01020.JPG

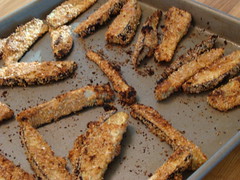
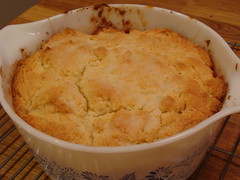
6. remove the crust from the oven, pour in the apple mixture and top with last of the crumbs. put it back in the oven for another 45 minutes. when it’s done, the top should be a beautiful golden brown. cool by putting the pan on a wire rack so air can circulate around it. cut into bars after they’ve completely cooled, if you can resist it. it’s a great idea to refrigerate the bars so they set a bit more.

And now: Heather's Mum's Crumble!

DSC01025.JPG

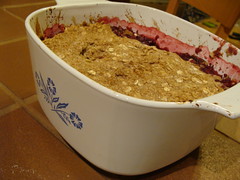
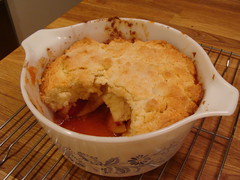
Really, this is just the recipe for the crumble topping. You can use whatever fruit you want, whatever baking dish you want. I did the deep Corningware because I love lots of fruit. Mum has done it in pie dishes too.

Ingredients:

Fruit
1 cup flour (I always use whole wheat)
1 cup brown sugar
1/2 cup butter
1 cup oats
You can use whatever flour, whatever sugar you think tastes best. Try adding chopped nuts instead of oats!

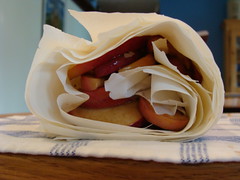
Fill the dish to just below the edge, with fruit of your choice. Our apples were very tart, so I added some sugar, but not much because the raspberries help sweeten it too.

DSC01015.JPG

Put flour, sugar, and butter into a food processor and pulse until it is all mixed and even. Put this mixture into a bowl, and mix in the oats (you don't want the oats chopped up in the processor).

Pour this mixture over your fruit and pat down. Bake in a 375 degree oven for about 30 to 45 minutes, or until it browns on top, and juices bubble up the edges.

Recipe: Apple-Phyllo Strudel

DSC01118.JPG
I love pastry. As a kid, I'd sneakily break off little balls of any pastry mum was making, hide in the living room, and eat it raw. I always begged for the leftovers from pie crusts so I could play with them. And by play, I meant eat. It was always a very sad moment when it was time to throw away what was left, and clean up my hands. Extra dough always got thrown in the compost, where it got covered in old tea leaves and juice from what might have once been onions.

With this history behind me, I knew I had to do apple-pastry something while in the midst of the Apple Glut of 2008. While searching the freezer for ideas, I found not one, but two boxes of phyllo pastry! All the yum of crispy pastry with almost none of the work! I happily put one box in the fridge to defrost overnight, just like the box said.

DSC01112.JPG

Then the next day, I forgot about it. When I did remember, I just thought 'oh, I'll do that tomorrow!' and went about my business. The next day I had the apples all cooked, the oven pre-heated, amaretti biscuits crumbled, and when I opened the package the phyllo had the exact texture of dried, brittle paper (and about the same taste). Touching it shattered it into a thousand pieces. Was it the extra defrost day? Was it just old? The packaging certainly suggests the latter. I brought out package #2, and defrosted it in 20 minutes by opening the oven door, and placing the plastic-wrapped package on a tea towel on the open door.

(It's worth it to note that I have done this before: the first time I used phyllo, I bought it and brought it home, expecting to be able to use it right away. The oven works. Immersing it in hot water also works, as long as the package is ENTIRELY sealed. Ask me how I know.)

DSC01111.JPG
(why bother dirtying the food processor, when a fork works just as well?)

This dessert was very good. I didn't save the syrup from the frying pan full of apples and sugar, like the recipe suggests, simply because I was already going to be eating the whole thing by myself. It didn't refrigerate too well; the next day it was okay, but after that the phyllo got very soggy. I also didn't add any raspberries or dried fruit.

DSC01114.JPG
Apple-Phyllo Strudel
(original recipe from Epicurious can be found here)

6 Granny Smith apples, peeled, cored and cut into 1/4-inch slices
1/2 cup dried cranberries or cherries
1 1/2 cups brown sugar
1 tsp cinnamon
6 sheets phyllo dough, thawed
Vegetable-oil cooking spray
1/2 cup amaretti cookie or graham cracker crumbs
1/2 cup fresh or frozen raspberries (thawed)
12 oz nonfat vanilla yogurt (optional)

Heat oven to 350°F.

In a 12-inch nonstick pan over medium heat, cook apples with dried fruit, sugar and cinnamon until tender, about 10 minutes. Let cool, reserving liquid for optional sauce. Layer 2 phyllo sheets on top of each other.

Coat top of phyllo layer with cooking spray; sprinkle with 1/3 of cookie crumbs. Layer 2 more sheets of phyllo on top, coat with cooking spray, then crumbs; repeat once more. Spread apple mixture on top; roll up from the shorter end.

DSC01120.JPG
If I'd peeled the apples, there wouldn't be that wonderful pink in the filling!

Coat a cookie sheet with cooking spray. Place strudel on sheet and bake 25 minutes or until golden brown. Let cool. Cut into 8 pieces. Place a slice on each plate; top with berries.

Optional sauce: Mix yogurt with reserved liquid and drizzle over slices.

Friday, September 26, 2008

Recipe: Apple, Onion & Cheese Pizza

DSC01106.JPG
To give myself a chance to eat even more apples, I decided to find a savory apple recipe. This meant I could eat apples for lunch, dinner, and dessert! (I'm much too set in my breakfast ways for apples to intrude.)

I found a wonderful recipe at everybody likes sandwiches. Oddly enough, this recipe is not a sandwich. Once I read the recipe, it made so much sense: apples + cheese = taste sensation. I think it would've been even better with tart apples, but all I had were sweet ones. The caramelized onions were so sweet, I was eating them like candy. I was lucky to end up with enough to cover the pizza.
Still life with most of an Onion

I made my own pizza crust from this recipe, from the same blog. I put it into the warm oven to rise, and I think it may have been too warm. The dough was an odd, spongy texture, and I used all of it to make the one cookie sheet-sized crust you see. It cooked up fine though. I also used whole wheat flour, so that might have done something odd.

Pizza is so easy to adjust, I'm not going to repeat the recipe, but just give a basic rundown of what I put on mine.

I cooked down most of a red onion in a frying pan until it was all soft, then added balsamic vinegar, turned it down a bit, and let it all reduce and get tasty and sweet.
DSC01099.JPG
I found a jar of pesto in the fridge, so I spread some of that on the dough, which I had rolled out on a cookie sheet. Then on went the caramelized onions. I had some goat cheese that needed using up, so that got crumbled over the onions.
DSC01102.JPG
Next came the main ingredient: the apples. Once again, I didn't bother peeling them.
DSC01104.JPG

The apples were topped with lots of Irish cheddar cheese, and then the whole thing got popped into the oven until the cheese was melted and going brown on top (about 25-30 minutes).

DSC01108.JPG

It made a fantastic lunch and dinner for a few days in a row, and it helped me use up things that just happened to be sitting in the fridge.

Wednesday, September 17, 2008

Recipe: Breaded Eggplant 'Fries'

I have come across another produce issue while house-sitting for my parents: fridge veg.
DSC01085.JPG
Mum was very nice and left me with a full fridge, but the fridge is not full of stuff I normally cook. I'm used to cooking broccoli, peppers, mushrooms, but I've never cooked an eggplant. And what is one girl meant to do with an entire cauliflower? There's something I think may be bok choy, there was something squishy and runny in a bag (that got thrown out), and something else mysterious.

I decided to tackle the eggplant first. I love the internet, because I can search so many recipes so easily. Don't get me wrong, I love books (and have a pretty good cookbook selection growing) but the internets are so convenient! And also educational. I found out that the eggplant is a member of the nightshade family (eek!), and is a close relative of tobacco (double eek!) and because of the latter fact, the seeds contain nicotine. I cut them out when I read that, although Wikipedia assures me that the seeds are edible, and the nicotine is negligible. I'd have to eat 20 pounds of eggplant to get the nicotine equivalent of one cigarette.

The world 'eggplant' developed in Canada, the US, Australia, and New Zealand. Most of the rest of the world uses 'aubergine', unless you're in India, where they call it 'brinjal'.

I also learned that to tell if an eggplant is ripe, press the pad of your thumb against the eggplant. If it bounces back, it's ripe. Too ripe if the indent stays.

Thusly armed with knowledge, I decided to go with this recipe from Joyful Abode.
DSC01084.JPG

A note on breadcrumbs:
This being my mum's kitchen, I wasn't sure what I'd find in the cupboards, and I really didn't feel like going out to buy more groceries, to make a recipe I chose in the first place to use stuff up. I found a jar (unlabeled, of course) of what I guessed was wheat germ. I couldn't find any bread crumbs (apart from the crumbs collecting at the bottom of a bag of crutons) so I did a deep cupboard search. I found a collection of bags that I believe to be from when my grandpa lived here, and were used for his grainy, mushy cereal. They were all crumbly, and full of fibre, and I am all about the whole grains, so instead of bread crumbs, I used a mix of cracked wheat, bran, crumbs from the cruton bag, and a touch of psyllium fibre (I'm not even sure what that is, but I was in an adventurous mood!).

Breaded Eggplant 'Fries'
DSC01093.JPG
  • 1 large eggplant
  • 1/2 cup toasted wheat germ (I didn't bother toasting, because I wasn't sure what I had was actually wheat germ)
  • 1/2 cup Italian breadcrumbs (or random mix of other flaky kitchen things)
  • 1/2 cup parmesan cheese
  • 1/2 teaspoon garlic salt
  • 3 eggs, beaten (I think I could've gotten away with two)
Preheat the broiler (mum's automatically came on at 550 degrees).

Cut eggplant into little french-fry like wedges, and then if you want to, you can salt them with Kosher salt to draw out the bitter juices. The way I did it this time was to put the wedges into a colander over a bowl, sprinkle liberally with kosher salt, and top with a smaller colander weighted with the Kosher salt box, so the eggplant pieces were squished. (I did this. Don't know if made a difference, but the fries weren't bitter)

Mix together your crumbs, cheese, and salt in a bowl.
DSC01089.JPG

When your eggplant sticks are ready, rinse or wipe off the salt and pat dry with towels. Then dip each stick into the beaten eggs, and roll in the breadcrumb/wheat germ mixture. Place on a cookie sheet prepared with cooking spray.
DSC01091.JPG
Broil for 2-3 minutes, flip the sticks, then broil for 2-3 more minutes, or until crispy. I tried 3 minutes the first time, and that was enough to set of the smoke alarm.

The first night, I ate these with mum's mustard collection (Provencal red pepper mustard, tarragon mustard, and good ol' Dijon), and a blob of pesto for a rest from the heat.
The next day, I heated the leftovers up in the oven (microwave would've turned them to mush), and dipped them in Thai-style peanut sauce.
DSC01094.JPG

Sunday, September 14, 2008

Recipe: Eve's Pudding

DSC01067.JPG
It's that time of year again. The time when apples are popping up wherever you look. I have been innundated in apples for the past few weeks. Luckily, I have had some variety though; Lester brought me 3kg of teeny, tart little green apples. Just as I was almost done with those, I came out to my parents' house in BC to house sit. They have not one, but TWO apple trees. Luckily for my sanity, one has a grand total of 7 apples on it. The other one is a different story.
DSC01044.JPG
Spindly, yes. But fruitful. Dad planted these just after we moved to this house 10 years ago. He also planted some plum trees that have produced nary a plum.
But back to the first of many apple recipes I have saved up for you readers.

I have been trawling the internet for any and all apple recipes I can find. You see so many recipes that look promising, but then I read the ingredients, and there's that disheartening line that says 'peel and core one apple'. I don't have one apple. I have bushels. I don't want to make 12 muffins and only use one apple.
Step One

I have a bit of a confession: I don't like eating raw apples. And I despise apple juice. If I do eat raw apples, I like them cut up. I got out of the habit of raw apples when I had braces, and never got back in.

This recipe used 3 apples, which was slightly better. Right now I'm hampered by the fact that I'm alone in this city; any friends I once had here have moved away. So I want to use lots of apples, but not eat myself into being an apple blimp.
DSC01062.JPG

Eve's Pudding is a British recipe, so forget your colonial thoughts of pudding being a mysterious, wobbly, semi-solid. Pudding just means dessert, so forget the Jello (can I put apples in Jello?). It is basically just apples, topped with a traditional Victoria sponge cake. The sponge creates a lid for the baking vessel, which means the apples get steamed so they are nice and tender.

Whenever recipes say to peel the apples, I ignore that. I think a lot of the flavour is in the peel, not to mention fibre and nutrients. I grew up with apple trees in the garden my whole life, and have never felt the need to peel them before eating. Scared of bug footprints? Rise 'em, but you don't need to wrestle off that scary outer layer that has (gasp) touched the outside world.

This recipe was nice, easy, and has a good ratio of apples to other stuff. Right now I want more apples than other stuff, for the aforementioned reason of not wanting to become as round as an apple. The original recipe (found here, at Curiously Ravenous) mentioned milk in the directions, but not in the ingredients. I looked around at other Victoria Sponge recipes, and none of them called for milk, so I left it out.
DSC01065.JPG

Eve's Pudding
for the Victoria Sponge Cake:

1 1/4 cup flour
1 1/4 tsp baking powder
pinch salt
1/2 cup unsalted butter, at room temperature
6 Tbsp sugar
2 eggs
1/2 tsp vanilla extract

3 apples, peeled and cored
1/4 cup sugar
1 Tbsp lemon juice
1/2 tsp cinnamon
pinch salt

1. Slice apples into thin 1/8" slices. Gently toss with 1/4 cup sugar, lemon juice, and cinnamon. Set aside.

2. Preheat oven to 350F. Whisk together flour, baking powder and salt. In another bowl, cream together butter and sugar with a mixer until it becomes smooth and pale. Alternately add in the eggs and flour mixture. Do not over beat.
DSC01064.JPG
3. Spoon apples into 6 to 8 single-serving ramekins or one 48oz souffle pan, about 3/4 of the way full. Pour any remaining juices over the apples. (I just mixed my apples etc. in the 1.5L Corningware dish I wanted to cook the pudding in. Saves cleaning one bowl!)

4. Spoon batter over the apples and level out the batter to form a flat seal to cover the fruit (a flat spatula might make this easier, but I used a wooden spoon). Sprinkle the top with sugar.

5. Bake for 45 minutes.


After 45 minutes, my sponge was not entirely cooked in the middle, so make sure to check before you turn the oven off.

Sunday, September 7, 2008

Theatre Cooking, It Begins

Well here's the beginning.

Cooking by theatre professionals, places we eat, things we frequent and love, and the mishaps that surround all the joy.

This is a blog of multiple publishers for the following content.

  • Cooking pictures and recipies of things we whip up, by we I mean theatre professionals, our Signifigant others or just anyone who has to deal with the theatre lifestyle.
  • Pictures and reviews of places we eat around theatres or around our work. Where's the best slice of pizza to be had, where's the worst greasy spoon on your half hour break in Vancouver? And what's open for business when you finish a load out at 2 in the morning?
  • Other fun food-theatre related humor!
Currently there are only a handful of publishers for this blog. Leave a comment or fire off an email and we'll have you set up to post right here alongside us!

-Ravynn